Create a survey
Overview
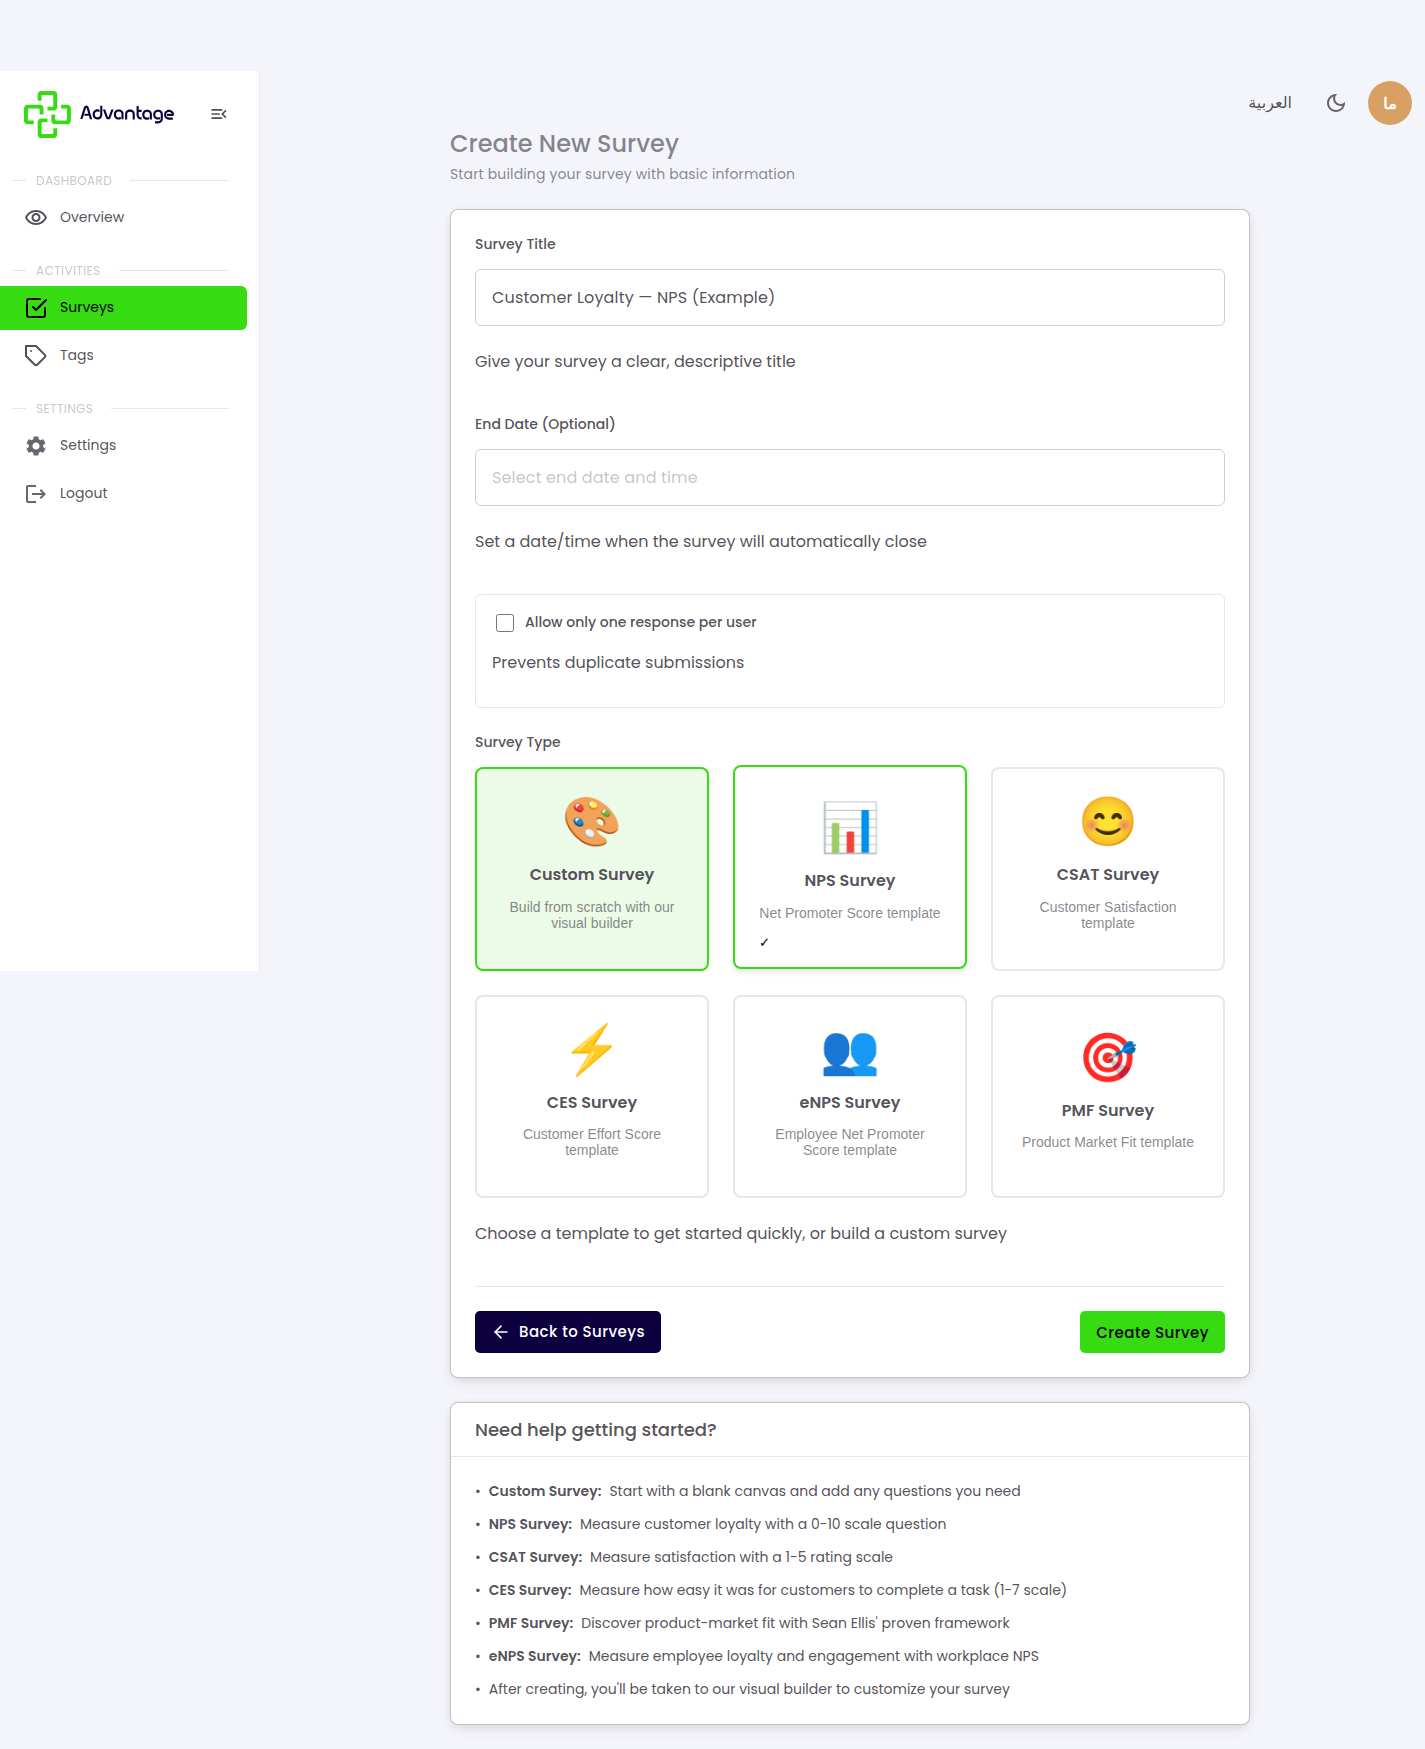
Creating a survey starts with giving it a title and picking a type that matches what you want to measure, then building your questions in a drag-and-drop editor. You can start from a ready-made template like NPS or a blank canvas. Here we'll follow a worked example to create a Customer Loyalty — NPS survey.
When to use it
- You want to launch a new survey, poll, or feedback form.
- You're measuring something specific like loyalty, satisfaction, or effort and want a head start.
Before you start
- Know what you're trying to measure — that decides which type to pick.
- Have your questions roughly in mind; you can always edit and reorder them later.
Step by step
-
On the Create Survey page, give the survey a title (e.g. "Customer Loyalty — NPS"), optionally set an end date and allow only one response per user, then choose a Survey Type. Each type (NPS, CSAT, CES, eNPS, PMF, and Custom) measures something different — see the Glossary for what each one means and its scale.
For this example, pick NPS, then choose Create Survey.
-
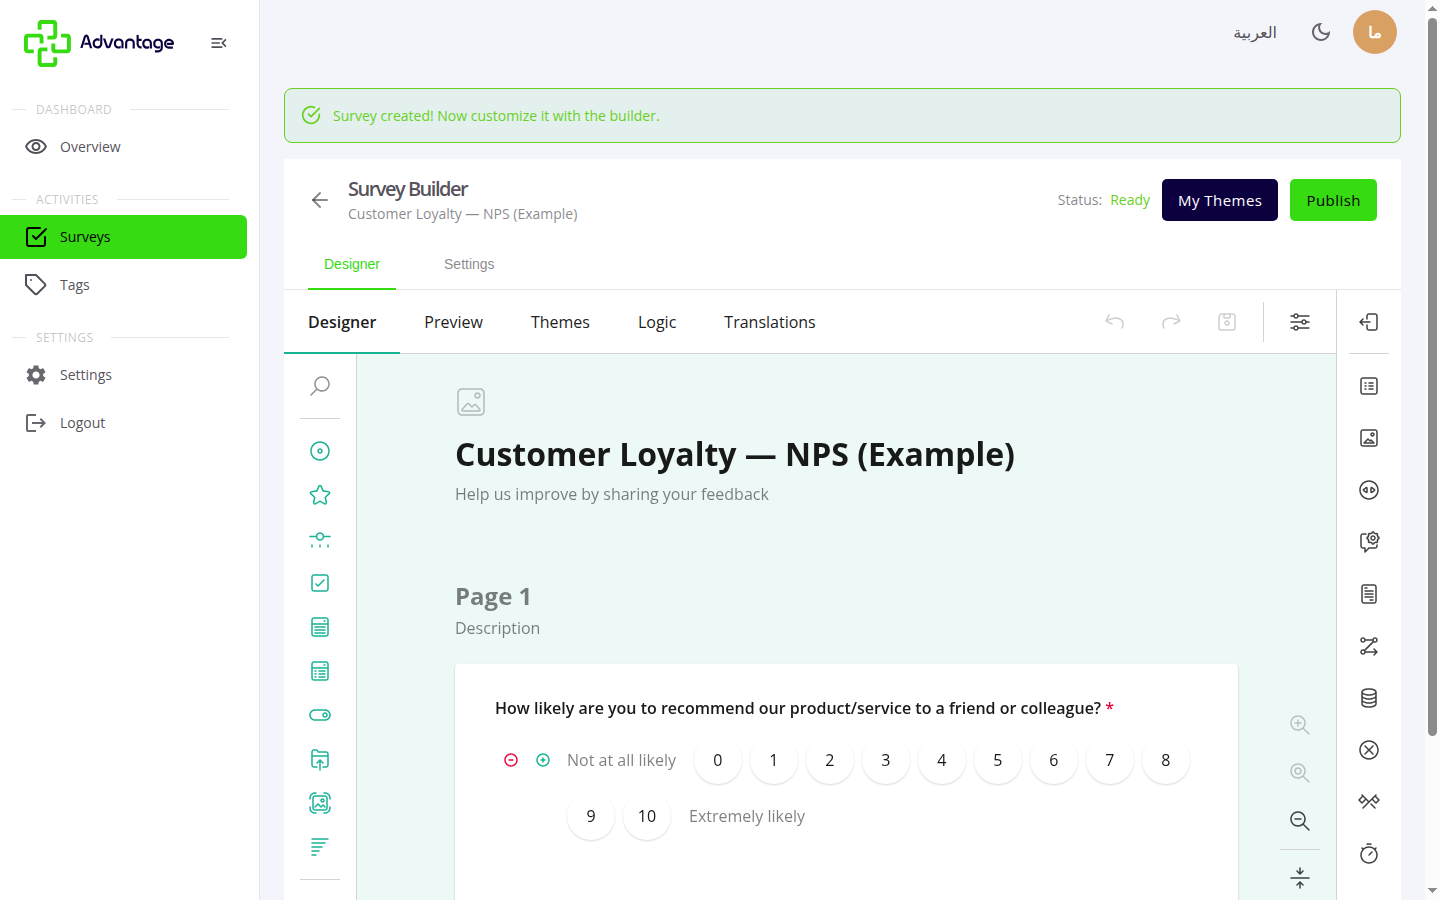
The builder opens with the NPS question ready. Add or edit questions from the palette, and reorder by drag-and-drop; your changes auto-save. When ready, publish it (see Publish & share).
Good to know
Which type should I pick for which goal? What you want to measure decides the type — see the Glossary for the full list of types and what they mean.
Does my type get an auto-computed score? NPS, CSAT, and CES get a score computed automatically in Analytics. eNPS and PMF do not — their raw responses appear without a headline score.
Do I need to save manually? No — the builder auto-saves as you work, so your changes aren't lost.
Can I customize any template? Yes — you can always switch to the builder to customize any template and add your own questions.
Tips & pitfalls
Tip: Start from the template closest to your goal, then tweak the questions — it's faster than building from scratch.
Warning: Deleting a question can't be undone after save — use Preview first before removing anything.
Next steps
Once your questions are ready, configure Settings, then head to Publish & share.